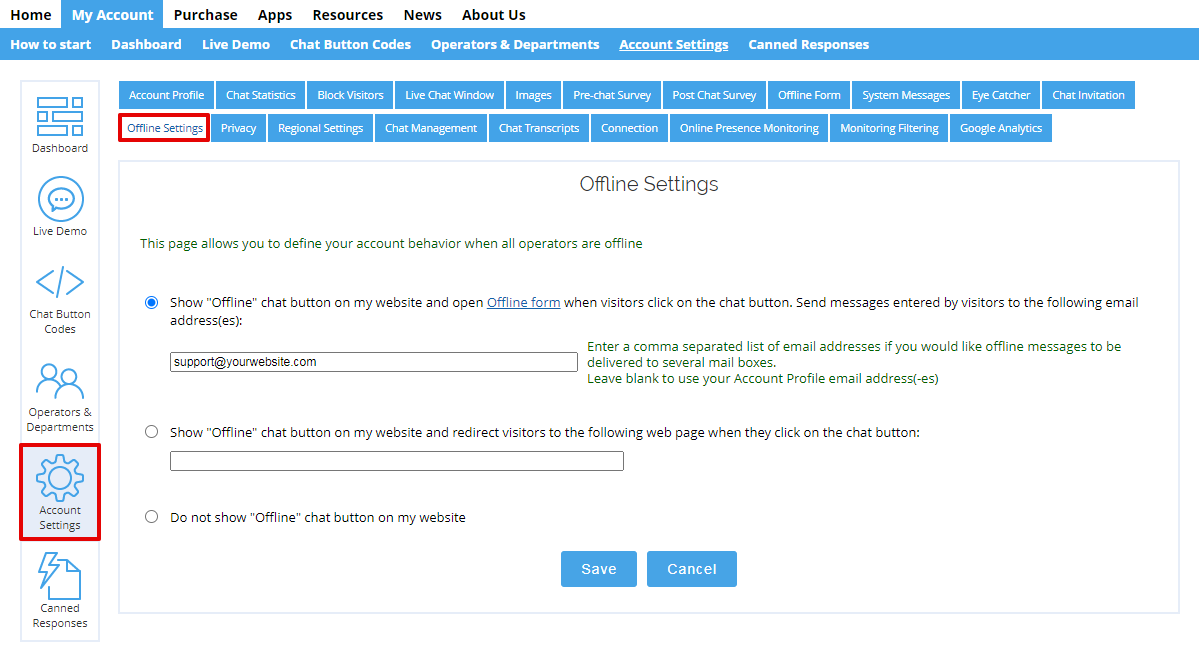
When your support team is not online, it's crucial to decide how your chat button will work. Provide Support gives you three different options to choose from. Just head over to the Account Settings -> Offline Settings page in your control panel to see the choices:
- Hide the chat button
- Show the chat button and redirect visitors to a different page
- Show the chat button and let customers leave a message through an offline form

If you choose to hide the chat button when your support agents are offline, customers will still be able to leave a message in two ways:
- If you have a direct link to your chat window somewhere, it will always be visible and will open the offline form, no matter which offline behavior option you choose.
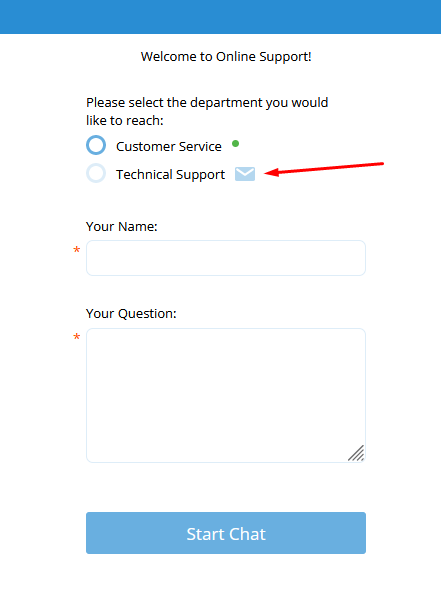
- If you have a "Preferred department" pre-chat field as a bullet list and some of your departments are offline, customers will see a "Leave a Message" icon next to these departments, and they can leave a message through the offline form. These messages will be sent to the department email.

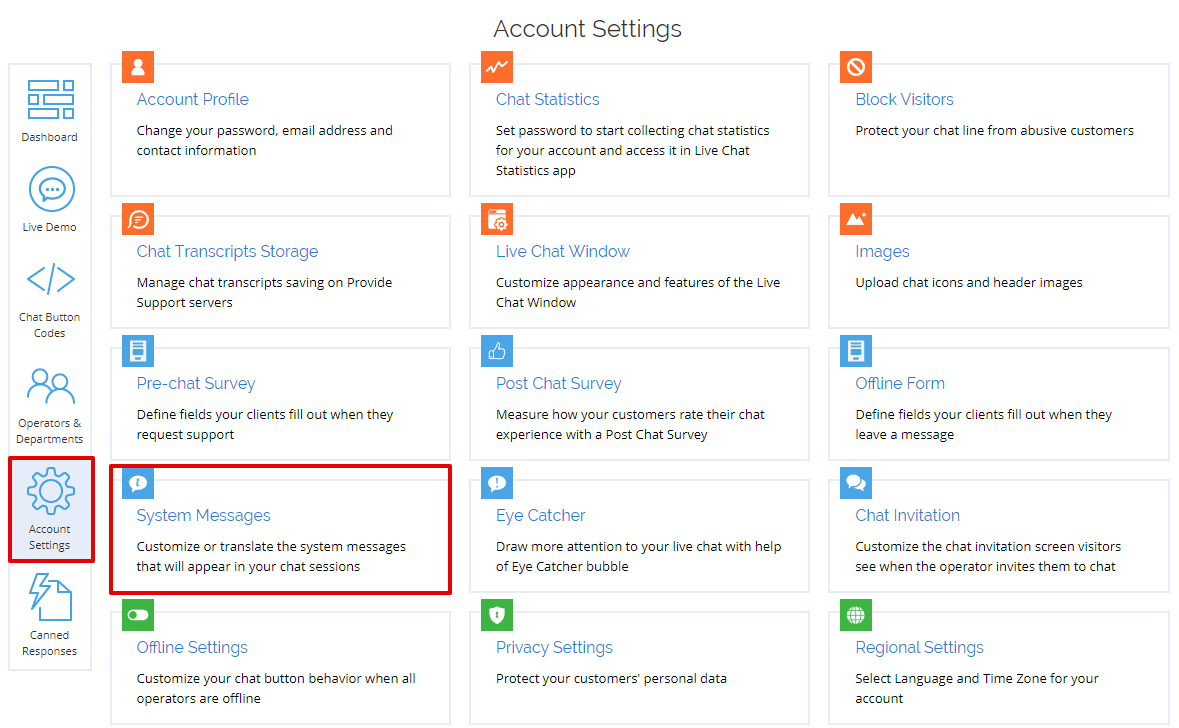
If you don't want your customers to be able to leave an offline message at all, you can remove all the fields from the offline form and show a message telling customers where else they can get help. You can set this message on the Account Settings -> System Messages page, Offline Form Text section in your account control panel.

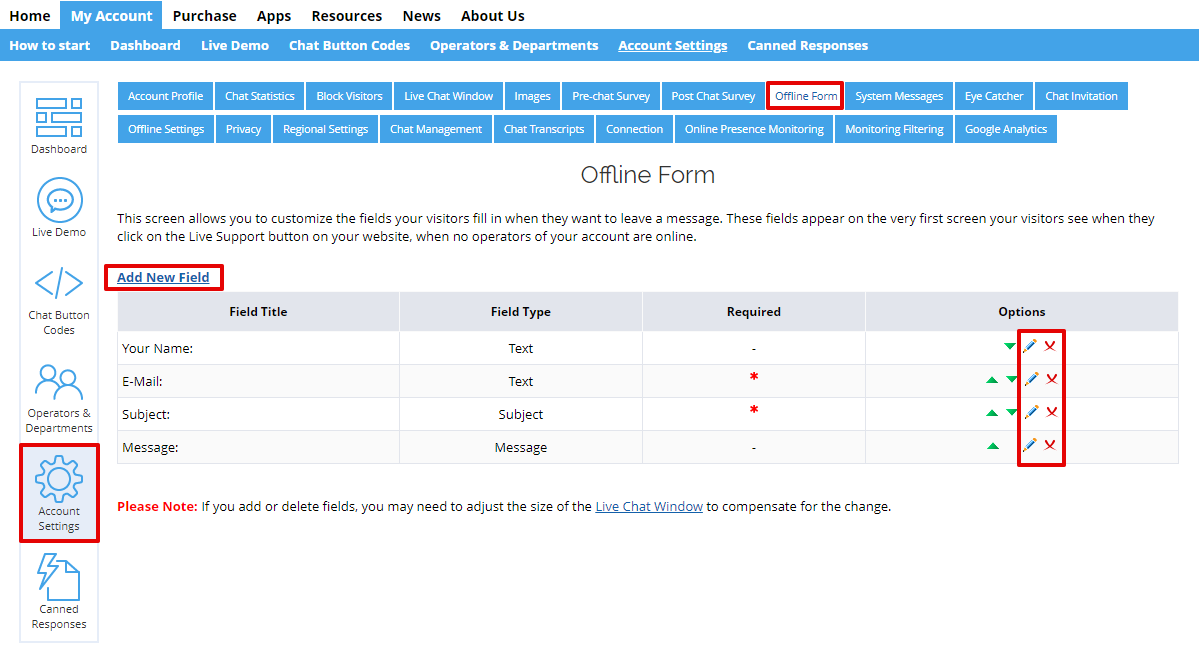
If you decide to show the offline form to your visitors, you can customize it by going to the Account Settings -> Offline Form page. By default, there are four fields created for you - Name, Email, Subject, and Message. Since visitor messages are sent to you like regular emails, we recommend keeping these fields, as they are essential parts of any email.
You can add additional fields to the offline form by clicking on the "Add New Field" link. To edit an existing field, click on the pencil icon next to it.

Note! The email field is set up as a "Text" field, so it will appear at the bottom of the offline message in the Visitor Details section. To reply to your client, you will need to manually copy the email from this section and compose a new email with it as the recipient.
Alternatively, our system can show your customer's email in the "From" field, hiding the real sender (Provide Support). This way, you can reply to your customer like you would with any regular email. To do this, you need to change the field type from "Text" to "Email Address". However, this method may cause the message to be blocked by your mail server, as such email spoofing tactics are often used by spammers and scammers. So, we recommend keeping the original settings for the Email field, even if it's a bit less convenient for the support agent.
